In this tutorial, we are going to create an Android Voice Assistant App using the ChatGPT API.
We will be able to ask questions via text or voice, and it will respond with text or audio.
# The step by step
First, we will set up the invocation to the OpenAI API, sending a question and capturing the response.
Then we will show the chat on screen—meaning, we enter the question through a text input (the simplest case) and show the response in a text box.
Afterward, we will make it so the question can be entered by voice and the chat response is via voice/audio.
# Accessing the ChatGPT API
Go to the OpenAI site: https://openai.com/
This system works with models:
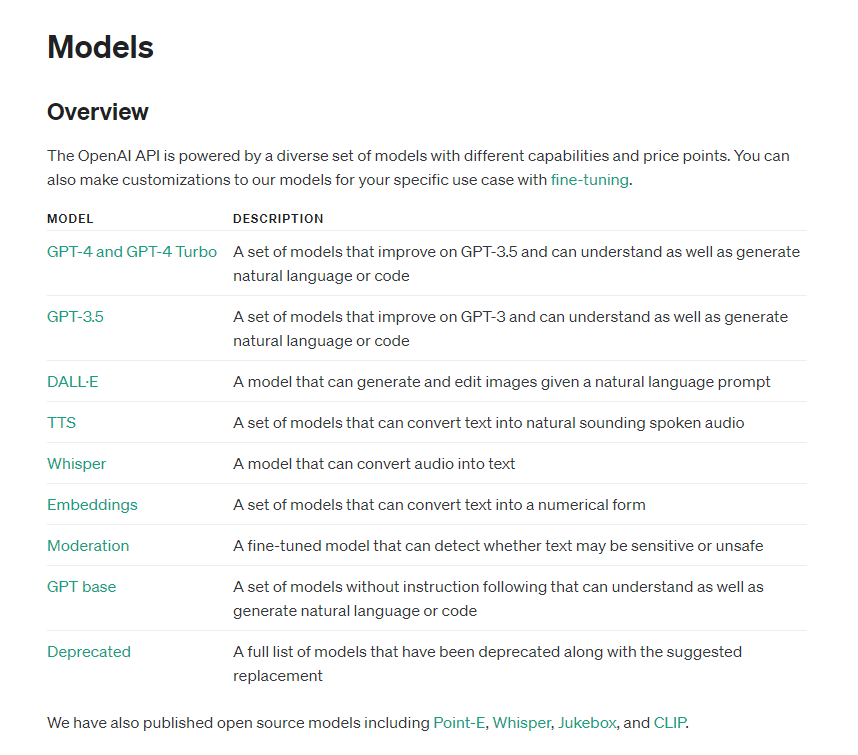
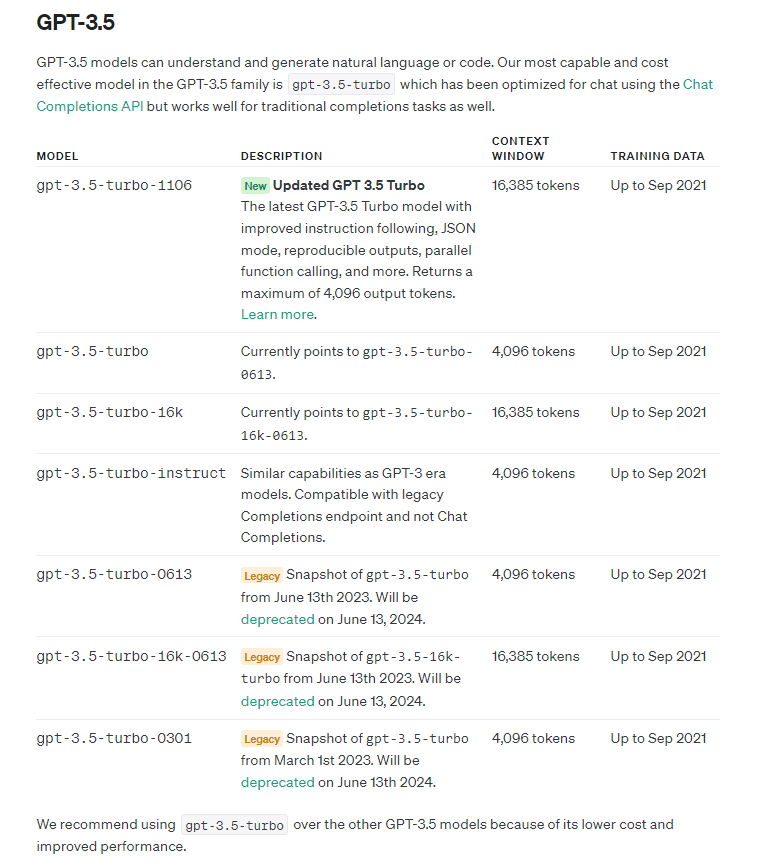
Each model has different characteristics. For this tutorial, we are going to the GPT-3.5 group, specifically gpt-3.5-turbo, which performs tasks with very good quality and is recommended by the platform.
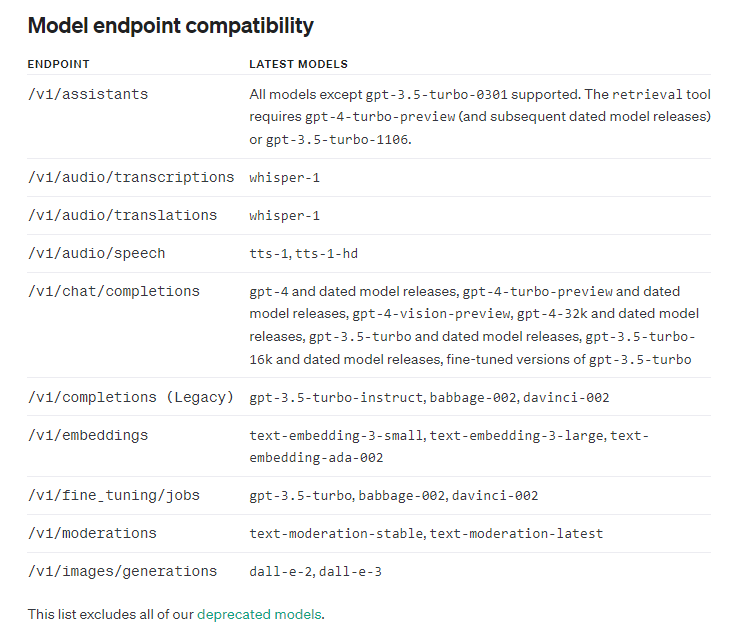
We are going to use the /v1/chat/completions endpoint, supported by the gpt-3.5-turbo model.
# Generating the API KEY
We are going to log into the site and generate the API KEY, which will identify us to the system when invoking the API.
Using the API has a cost, but they provide trial credit.

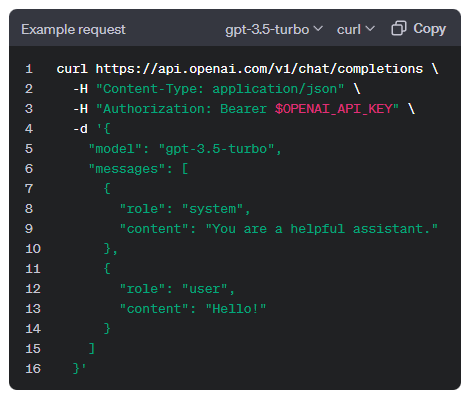
We look for the /v1/chat/completions service:
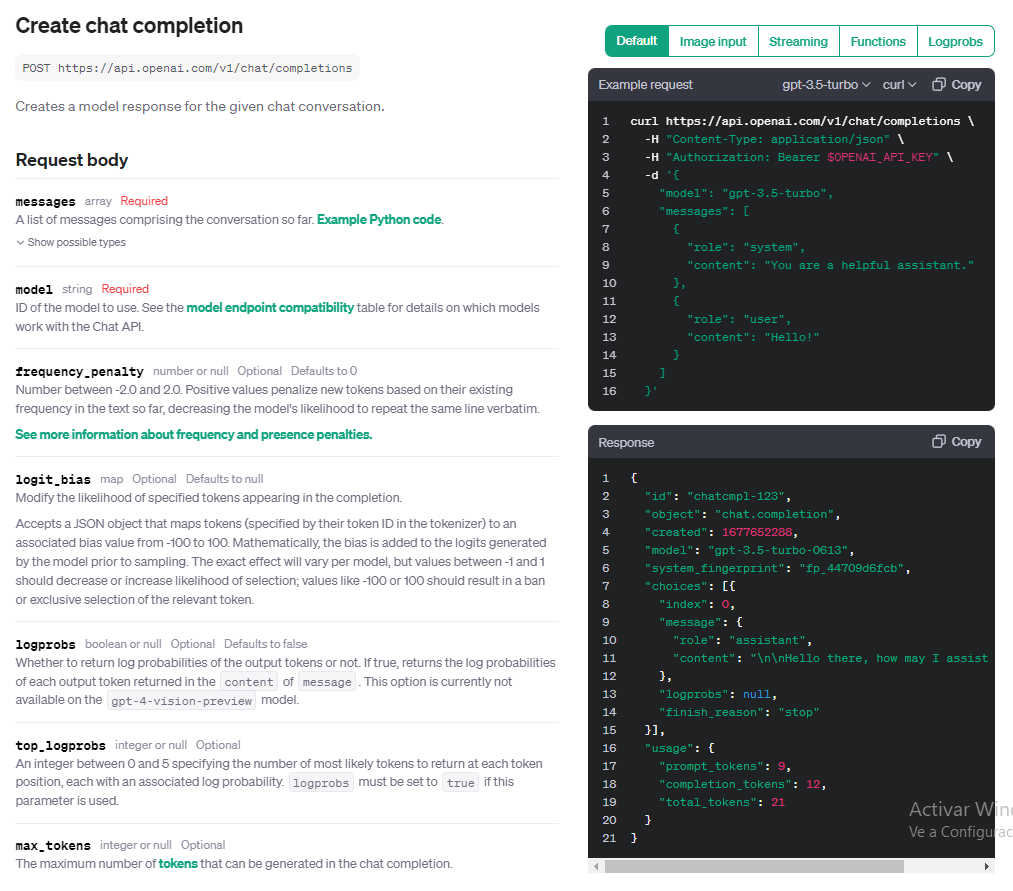
The mandatory input parameters are model and messages.
There are several optional parameters, including temperature—an important parameter because it varies the model's responses, from more deterministic to more random (i.e., how much it "hallucinates" or gets creative).
# Coding!
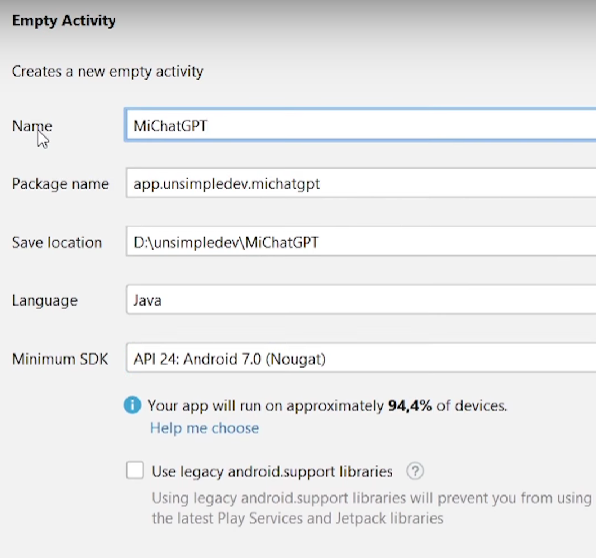
We create an empty project in Android Studio, MyChatGPT. I will use Java with Android version 7.0, but it can be any version.
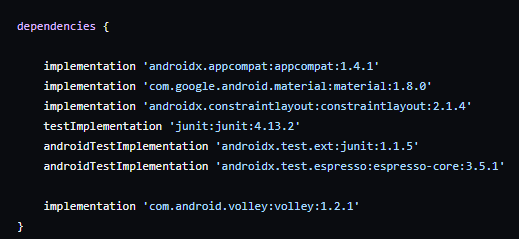
We need to make a request to the API URL, so we will include the Volley library in build.gradle, which allows us to make requests.
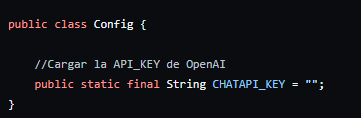
We create a Config class to store the API KEY we obtained.
Warning! Ideally, it should not stay inside the App because it's easily accessible to anyone who knows how to reverse engineer an APK. This means someone else could use it and we get charged. The best approach would be to make the request to our own server.
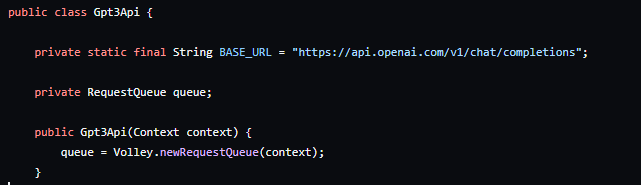
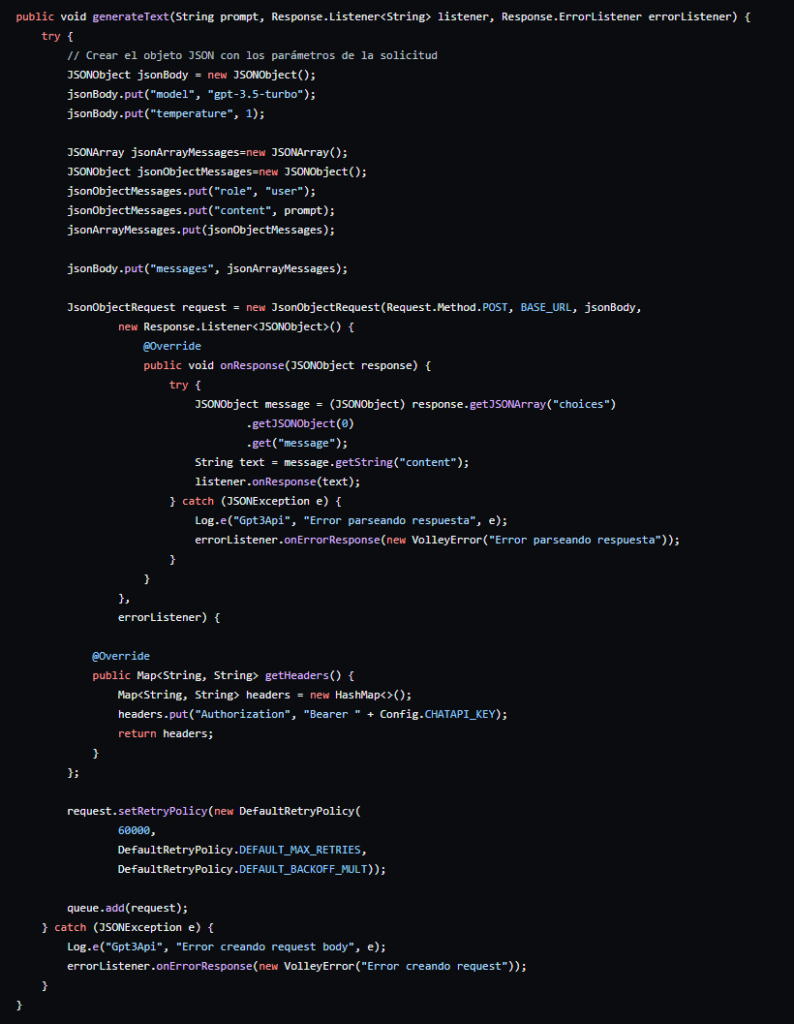
We encapsulate the service invocation in a class, Gpt3Api. We place the service URL and create a request queue for the connection.
We must send a JSON with this format:
It can be modeled with a JsonObject that includes the model gpt-3.5-turbo, optional temperature, and messages, which is a JsonArray containing a JsonObject with role "user" and content as the question.
We also add the header authorization bearer and a timeout of 60 seconds because it sometimes takes time to respond.
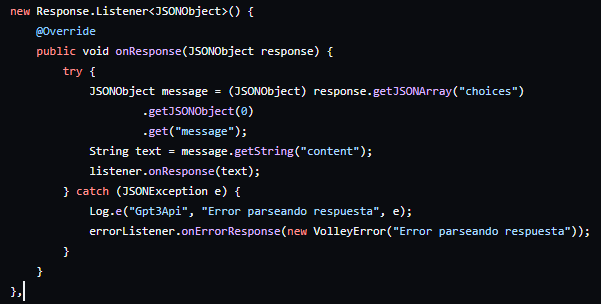
This is the response to process:
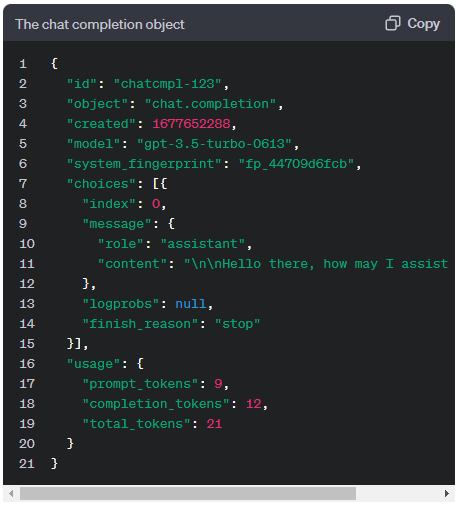
Here we have to go to the choices[0] field (since it is an array) and obtain message, which is an object. From message, we take the content field.
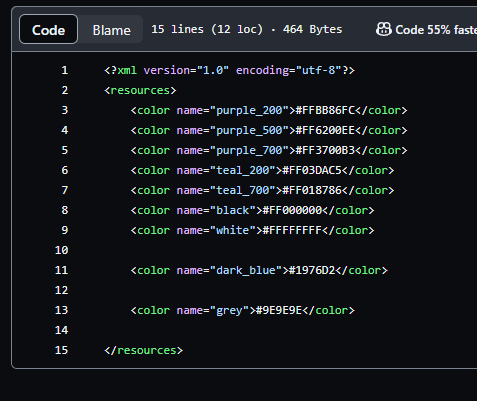
In the colors.xml file, we add two colors that we will use in activity_main.xml, simply to make the screen look better:
We define the structure with a vertical linearlayout and a scroll, another linearlayout to progressively add the question and response, the input for the question, and the button. Finally, I add a progress bar. This is how it looks on screen:

The code would look like this:

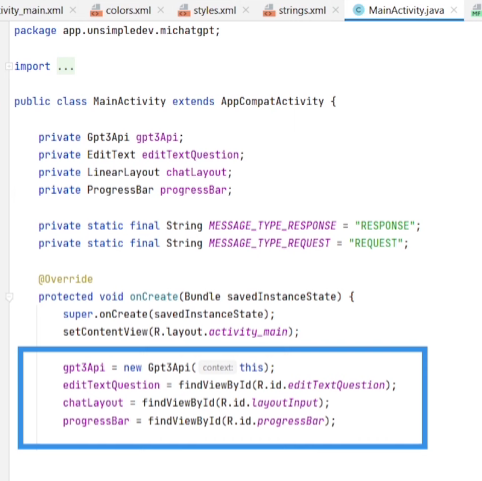
In MainActivity.java we define the attributes and initialize them:
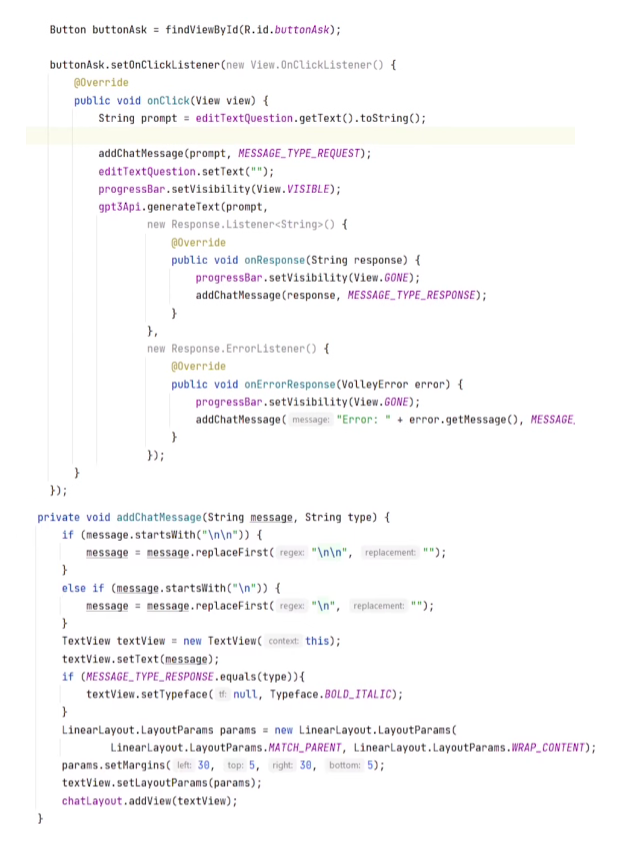
We give functionality to the button. In the onClick event, we invoke the generateText method, which sends the request to ChatGPT. It also adds the question to the layout so it is seen on screen, and upon getting the result, it does the same with the response.
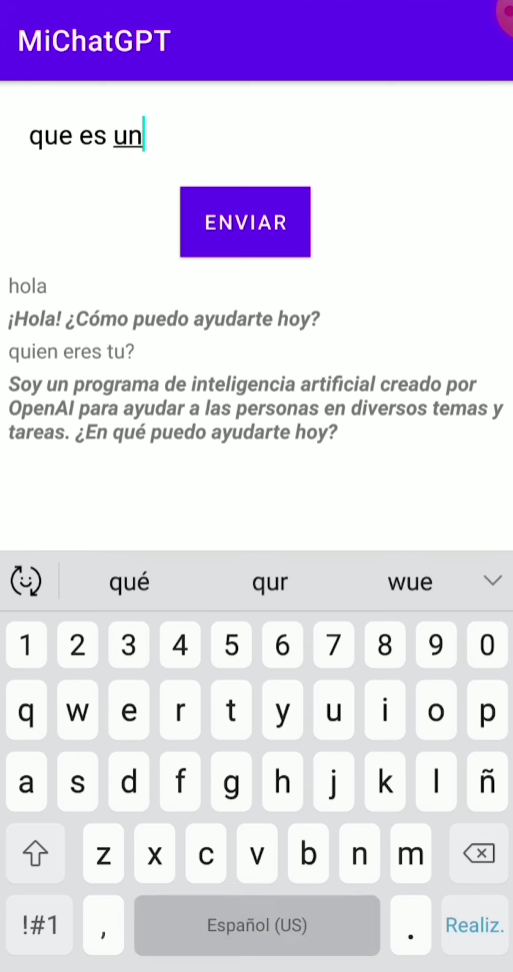
We already have the basic functionality working:
Now we incorporate improvements—entering the question by voice and converting the response to audio.
# Entering question by voice - RecognizerIntent
RecognizerIntent is native to Android; it opens a Google service for voice capture. It is very simple, but it works.
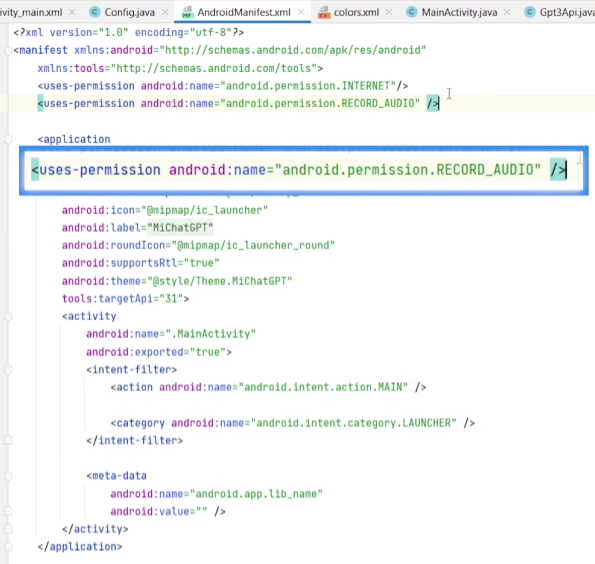
First, we add the android.permission.RECORD_AUDIO permission in AndroidManifest.xml.
We create the SpeechRecognizer class to encapsulate this functionality.
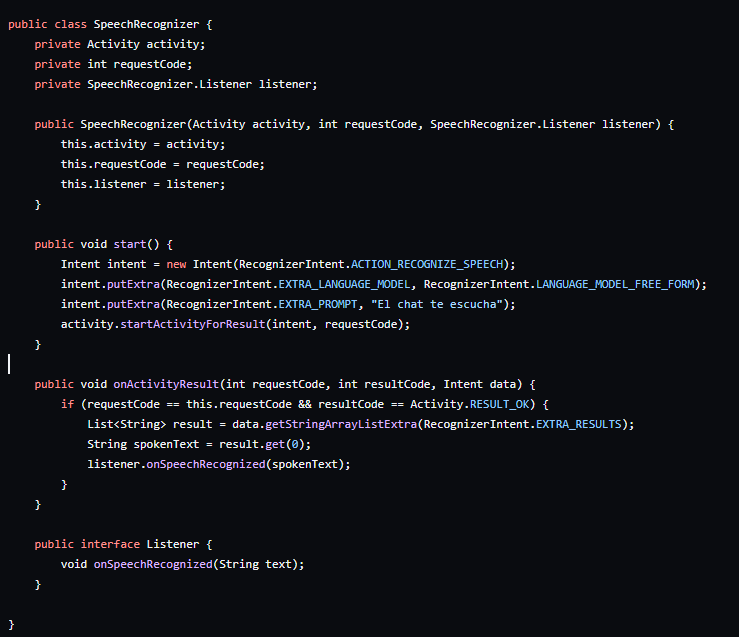
We define an Activity (which captures and processes audio) and a SpeechRecognizer.Listener as attributes. The listener is an interface that will be invoked once the audio has been processed (converted to text); that is where we will invoke the ChatGPT API with the question.
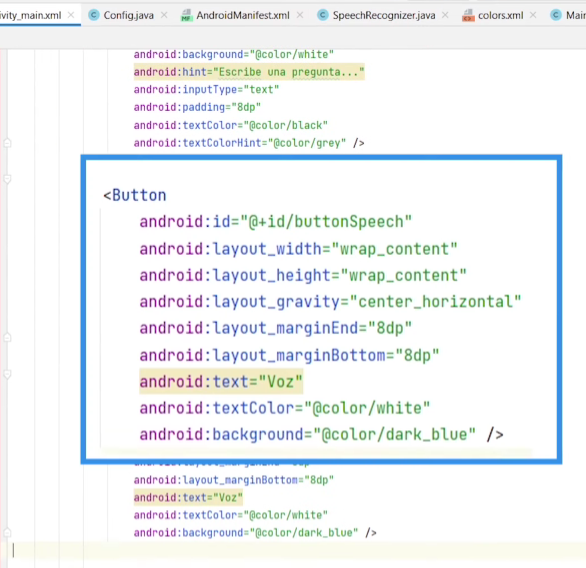
We add the button in activity_main.xml.
In MainActivity, we must implement the SpeechRecognizer.Listener interface and override the onSpeechRecognizer method. We create a callChatGpt method to invoke the chat.
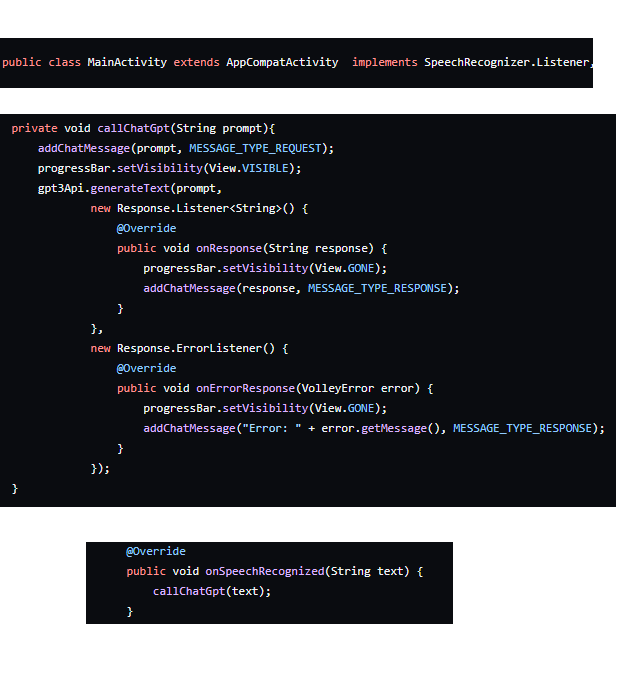
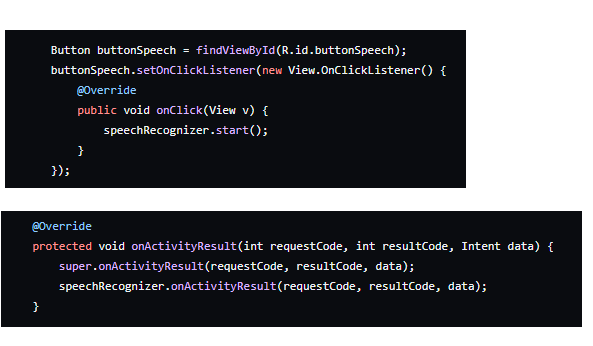
Inside the new button, we invoke Start from the SpeechRecognizer to initiate audio capture; the rest remains the same.
# Text to Speech - TextToSpeech
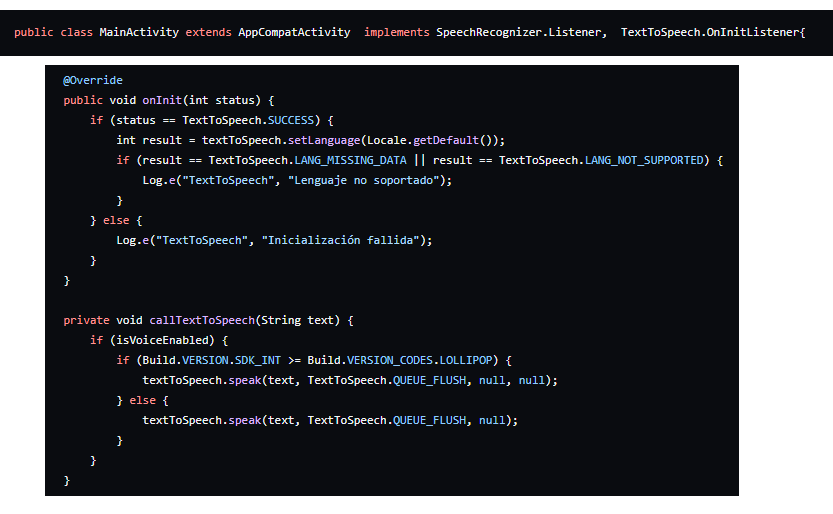
To convert text to speech, we are going to use Android's TextToSpeech. Here too, we must implement a listener in MainActivity: TextToSpeech.OnInitListener.
When the chat response arrives, we convert it to audio.
Finally, I add a checkbox to indicate if I want it to respond with audio or just with text, but you can see that in the full code.
# Complete Code
You can find it at: https://github.com/unsimpledev/MiChatGPT/tree/main
# Conclusions
A very simple project that shows how to use the ChatGPT API to build an assistant, which we improved using Android's own tools to convert Speech to Text and Text to Speech.